As I’ve been spending time writing for Justin, AKA “Graveyard” over at Swift|Silent|Deadly lately, he has agreed to exchange articles with me – for those unfamiliar, Justin comes from a military special reconnaissance background, and similar to yours truly, works to build himself into something of a Renaissance man, while writing and teaching about the skills he learns to better educate others at the same time. I think you’ll like what he has to say. Take it away, Graveyard.
I’ve heard that the thing separating a decent shooter from world-class shooter is an absolute mastery of the basics. Today we’re going to talk about some of the basics of operating a pistol. Most of this is probably a rehash for most of you, but all of us need a refresher – a map check, if you will – from time to time.
Operating a handgun doesn’t seem that difficult to most of us who have spent a good deal of time doing it. But if you break down all the discrete steps of shooting a pistol effectively, there’s quite a lot to it. First, there is the the draw-stroke, the simple act of getting the gun out of your holster. This one simple act can be broken down into several discrete sub-steps: clearing concealment, acquiring a high, firm, firing grip, withdrawing the gun from the holster, marrying the the support hand to the gun into an effective grip (a whole ‘nother basket of snakes), and so on. And that’s just to get the damn gun and pointed in the general direction of the target.
Introduction and Organization
As I indicated in the opening paragraph, today I’m going to cover some of these “basic” handgun skills. Such is the complexity of this skillset that it’s possible – probably even – that I might leave something out. It’s even more probably that I will say at least one or two things that you will disagree with. Because this is such a complex skillset, multiple ways of accomplishing the same tasks have evolved. Some of you will like some of mine, and it’s just fact of life that I won’t please all of you all the time. I ask that you take what you can use, and if you have a better way of doing something, I’m not here to tell you otherwise (mostly; if you’re cup’n’saucering it…you’re wrong.)
Now, I’m not going to go through every technique step-by-step. I will, however, talk about a few finer points of each. Maybe you’ll learn something or maybe you’ll just be reminded of something you already knew.
I’m going to address skills as I prioritize their importance. That is, I prioritize practicing skills that based on the likelihood that I’ll actually need them. For instance, if you have a defensive firearm use there is a very, very good chance – something like 100% – that you will need to get your gun out of the holster. It’s probably pretty important to keep that skill honed. Likelihood of necessity is placed above all else. Using this line of logic I divide my handgun skills into Primary Skills, Secondary Skills, and Tertiary Skills.
Primary Skills are those (relatively) high-likelihood skills: drawing the handgun, controlling the trigger, and managing recoil. Basically getting the gun out and making hits as rapidly as possible. I try to spend about 50% of all practice time working on these skills. Secondary skills are those necessary to keep the gun running in the event something goes wrong – you exhaust your ammunition or experience a malfunction. Secondary skills – reloading and malfunction clearance in case you didn’t pick up on that – occupy a smaller slice of my time, somewhere around 30%.
And finally, there is everything else. These skills could be called up the likelihood is incredibly low. Training is cheap, though, so it doesn’t hurt to practice them occasionally. A considerable number of skills get lumped into the “Tertiary” category, which gets whatever time is left, theoretically an even 20%. These skills include practicing in low light, strong-hand and weak-hand only manipulation, shooting on the move, etc.
With that out of the way, let’s get into the first Primary skill: the draw stroke.
The Draw Stroke
There are a couple of reasons the draw stroke should get a whole bunch of your training and practice attention. First, if you have a defensive gun use, you’re almost guaranteed to need it. Likelihood? Check. Next, the draw stroke is really complicated, and there are a lot of things that can go wrong. Doesn’t seem like it to you old hands, but you can foul your grip, fail to fully clear your cover garment, etc. – another good reason to spend a lot of time myelinating this skill.
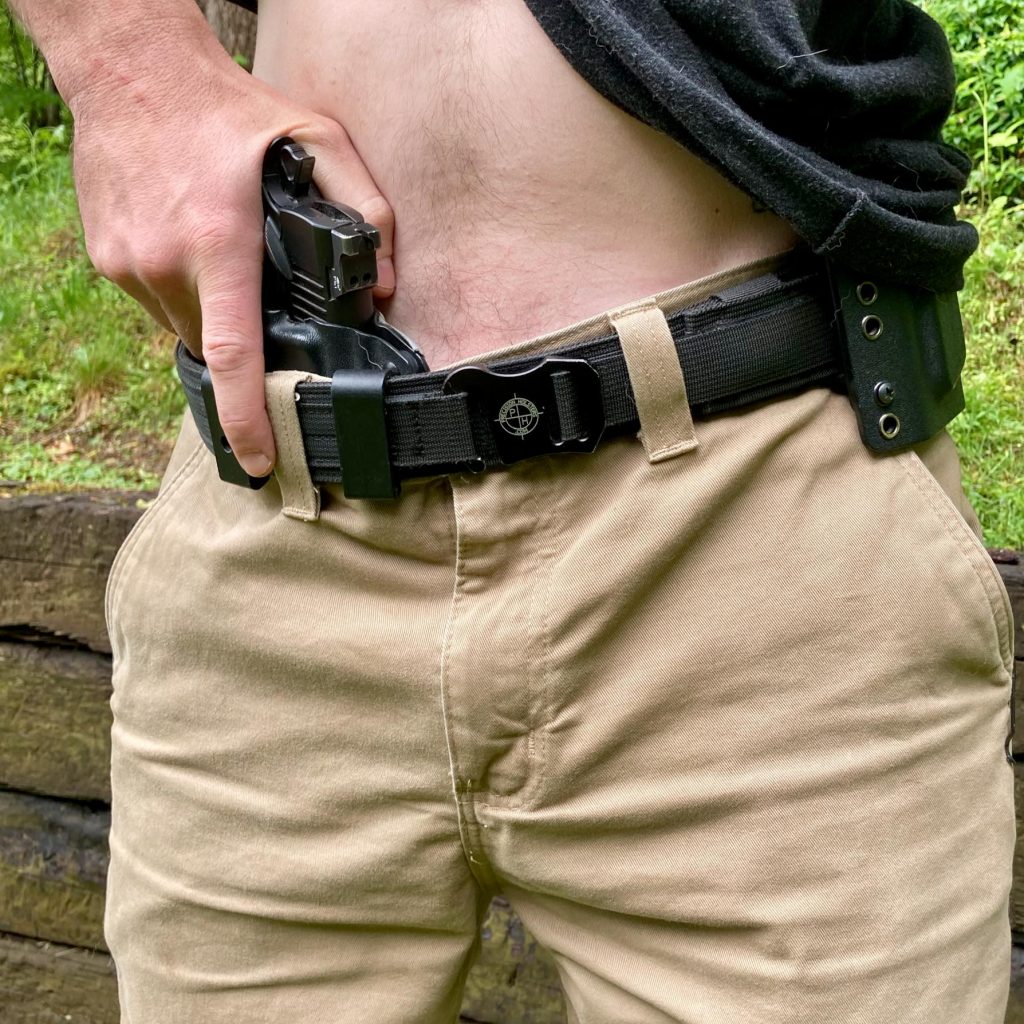
Gear Corner: I don’t want to go too far down the gear rabbit hole but a high-quality belt and holster will help your draw stroke immensely. A good holster should do several things. It should protect the trigger and trigger guard. Next, it should hold the gun securely. You should be able to walk, run, and tussle a little bit without your gun falling out. A good holster should be comfortable, help conceal your gun, and it should retain an open mouth for when you have to put the gun back into the holster.
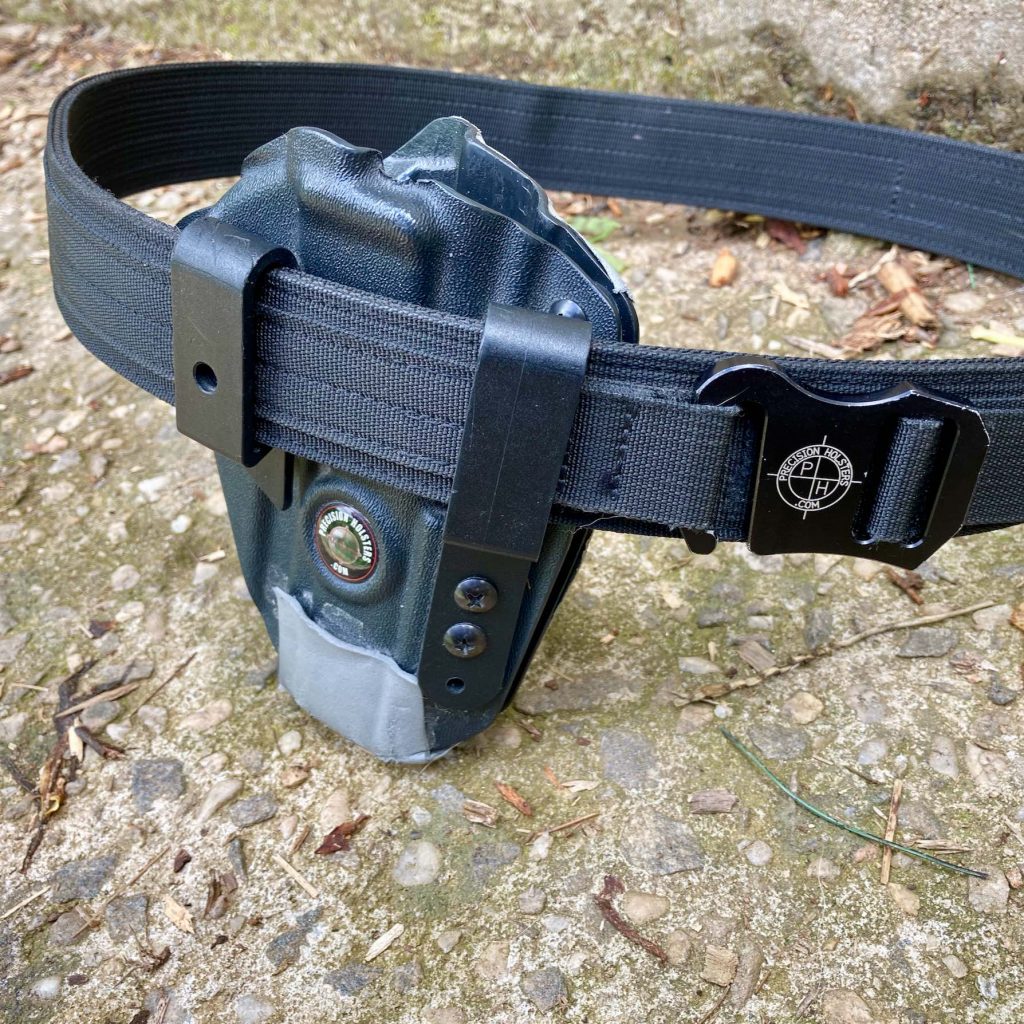
Pertinent to this conversation, though, a belt and holster should do two things: keep the gun in a reliably, consistent position and present the gun’s grip in a way that promotes a strong grasp. Short story: get a good holster and a belt to carry it on. Now, on to the actual draw stroke.
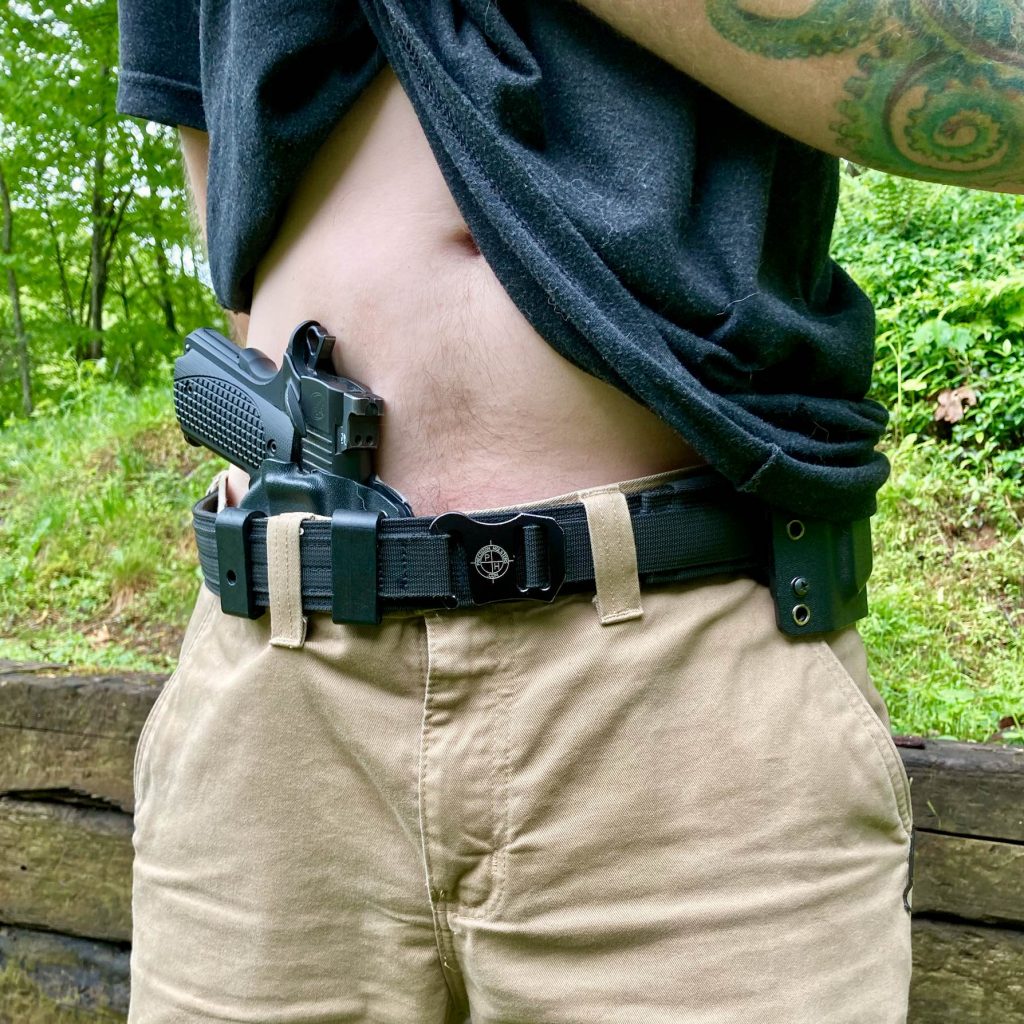
Step Zero: clear the cover garment. I don’t know that I’ve ever given a ton of thought to clearing the cover garment until Greg Ellifritz showed me a little trick that I really like. He calls it a “bicep curl” and it pretty much is…except rather than your arm protruding out in front of you it stays close to the body, lifting the cover garment… you know what? A picture says a thousand words, so check out the pic below rather than read another hundred words of me struggling to describe a rather simple movement.
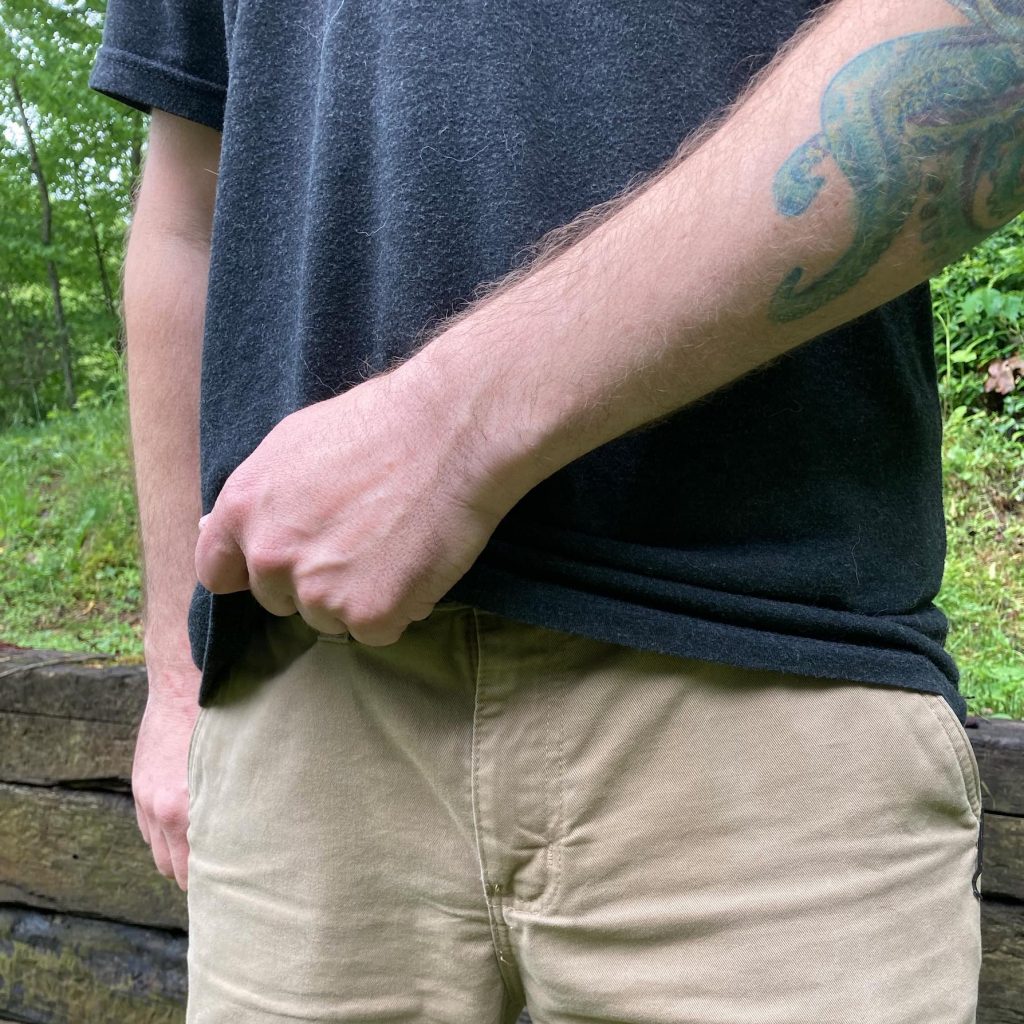
One important note: this does have to be done with some vigor. You want to get the garment(s) out of the way quickly. And speaking of speed… A quick word on “slow is smooth, smooth is fast.” I’m with Mike Pannone: it’s bullshit. It essentially says that “slow is fast” which can’t be true with the words “slow” and “fast” retaining their meaning. I’m also with Gabe White. I heard Mr. White on a podcast somewhere say it something like this: there is a perception that you can go very slowly enough times and your body will be able to do a high-fidelity repetition, only fast. That’s not necessarily true; when things speed up, you might find yourself doing some things slightly differently. Said another way, you can’t practice running by walking – you have to actually run.
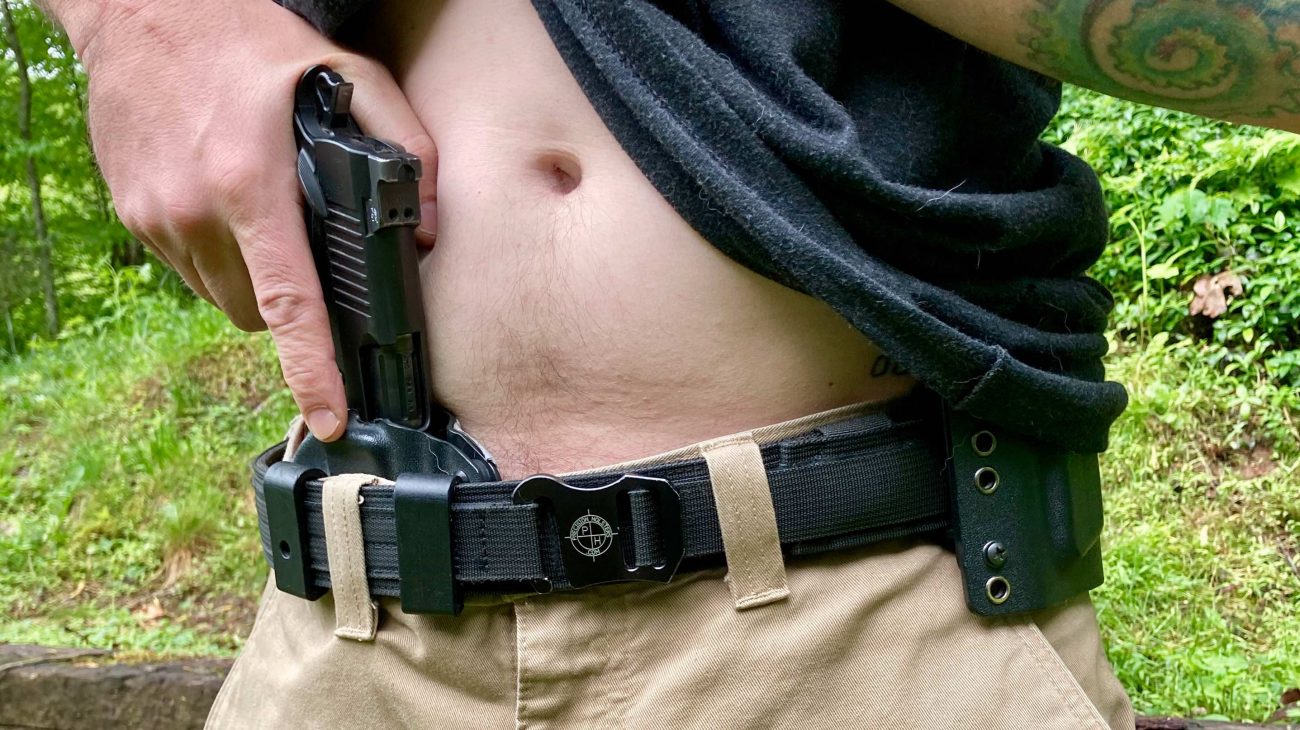
Step One: acquire a high, firm, full grasp on the pistol. This is where you can really get screwed up. As I mentioned earlier, a holster can help you out a lot here, but it can’t do everything. It should present the butt of the gun nice and high so you can grasp it, but it’s still probably going to be fairly tight to your body….depending on your body and your holster You’ll have to get behind the pistol, which isn’t always easy. Even though I’m a fairly slender guy, I still straighten by body just a bit to give just a bit more room behind the gun. End result: your hand should be wrapped around the pistol’s grip, your trigger finger should be straight along the holster, and your thumb should be poised to deactivate external safety mechanisms, if present.
Step Two: draw the gun and bring it to a position of retention. That is, bring the gun up to about your pectoral muscle and keep it tight to your body. As soon as the muzzle clears Kydex or leather, it should begin rotating up toward the target. At the point that it is in the retention position you can engage a target if need be (i.e. the target is at contact distance and extending the firearm would risk the attacker grabbing it).
I don’t have a whole lot so say in regards to refining Step Two except a mistake that I occasionally make. I flag my thumb nice and high, partially because I carry a 1911 and need to get on top of that safety, and partially to leave room on the grip panel for my support hand. If I try to round off this portion of the draw, the tip of my thumb will occasionally catch the hem of my shirt – not ideal. Don’t take shortcuts here, and more importantly, be sure you are clearing that cover garment nice and high.

Step Three: build your grip. Join the shooting hand and the support/non-dominant/weak/other-strong/[insert nomenclature of your choice] hand in creating a full grasp of the firearm. Mike Seeklander gave me a secret that helped me beyond belief: the “Judi chop.” I’ll let Mike explain that one.
Step Four: press the gun toward the target. At this point you’ve gotten your hand on your gun, built your grip, and are driving the gun toward the target. Bit mistakes here are “fishing,” swinging the gun in an upward arc like casting a fishing line, and “bowling,” creating a underhanded arc with the gun like rolling a bowling ball. The gun should be pressed in more or less a straight line out toward the target.

Wrap Up
And that’s it – the draw stoke. And I didn’t even cover getting into a proper stance first. Again, this might seem like old-hat stuff for you but I’ll put my money where my mouth is: I’ve already dry-practiced my draw roughly 2,200 times this year..and that’s after a full year of almost daily dry practice last year. Operating a firearm at a high level is difficult and requires refining a lot of little things. It requires a lot of practice. If you’re not practicing a lot, you’re probably not performing at least some of these sub-skills perfectly. If you are practicing a lot you want to map-check often to avoid the inevitable “drift” (it happens to me if I’m not careful). Hopefully this will help.
Stay tuned because I’ll be back over here with my take on some more “basic” skills soon.